|
this page updated June 27, 2007
Running a cable
to the trunk in a BMW Z3:
So what's the big deal about running a cable from the trunk of a Z3
roadster into the "cockpit" area to the radio?
All I could get from my ETK and TIS was this diagram (nothing in Bentley
manual):
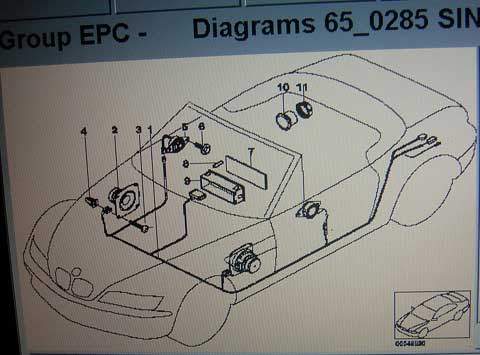
Not very helpful.
So I went to Daniels BMW and
asked them to find the way before Z3
Fixit Day, so we could do the installs.
This is what Emmy's trunk looks like with the carpeting removed:

Driver's Side |

Passenger Side |
You can see the cable going into
the CD Changer on the passenger side. This is where most connections take
place, instead of at the radio in the cockpit, the other end of that cable.
The battery cable also goes down the passenger side, so to avoid electrical
interference that could make unpleasant noises Steve decides to use the
driver's side - as BMW does with the radio- to route the cable to avoid
interference from the battery cable on the passenger side. So... where's
the opening on the cockpit side of that metal wall to get to the other
side?
Somewhere under here:

Yes, that's right. That same area none of us can reach, behind the
seats under the back window. It's where the top sits when it's down,
and when it's up you can put stuff there, but not a nice place to
have to do any work.
(Please click on the image to see a close up showing 3 plastic clips,
p/n's 51168400262, 51168400261, 51168400252 in beige that are worn
and good idea to replace) |

So this is the opening in the trunk we want to use. |

After about an hour Emmy's Roll Hoops are out |

Dissassembling the Roll Hoops is not fun. I wouldn't try it. There
are some instructions on Emmy's
Fixit Page for anyone who wants to try it. Some people skip removing their roll hoops and just squeeze the wires through. |

Take out the Seat Belt too. |

And take out the storage bin/subwoofer trim as well |

Aha- Steve has hit paydirt.A bundle of wires heading to a grommet. |

Grommet from above |

Grommet from below |

light from above coming through the grommet hole |

The passenger side still had to be dissassembled this far to get
the storage unit/subwoofer trim out. Only then will the carpet release
to reveal the grommet to the trunk. |
This was just my experience,
here are the words (and pictures) of wisdom from other Z3 owners who have
found a way to route their wires from the cockpit to the trunk. DaveT
did not have to take apart his roll hoops.
Dave T writes:
I routed wires between the center console to
the trunk when hardwiring my iPod. Basically, you can remove the trunk
liner and you'll find two cable access points between the trunk and the
roof well - one on each side, in the corners. I used the one behind the
driver's seat. You'll also need to lift portions of the carpeting in the
roof well. This can be a little awkward for us big guys to move around
in the cockpit. There is a rubber grommet between trunk and this area
that can be removed to pass the wire thru. Once I had the wire into the
well, I decided to take the wire along the edge of the well around to
the area where the subwoofer is installed. Remove the subwoofer - top
panel off and a couple of screws, if I recall correctly - and you can
see an area where a cable will pass thru. I think that the wiring for
the subwoofer takes this path, as well. Once you have the cable in the
subwoofer area, pass it down to the area below where the sub sits. You
can push the cable between the plastic (?) and carpet(?) into the area
at the back of the center console. Most people have two blank knock out
plates here. I used one for the alarm light. If you can, remove one of
the knock out plates and use a piece of wire to help grab the cable and
fish it through. Once the cable is in the area below the knock out plates,
you should be able to fish it through to the center of the center console.
From here, you should be able to follow the instruction we used for wiring
the UNGO to get the cable to the front of the console or dash.
Here are a couple of pics showing the entry point in the trunk and the
exit point on top:

cable1
In the trunk
|

cable2
by the roll hoop
|
Harvster writes:
Get an Alpine
S620 from ebay for $100 and a Soundgate interface and plug into the
preexisting wiring?. That hole does not go to the trunk. All wiring
for stereo runs behind the drivers seat into the left trunk area. Since
he has a storage compartment and no subwoofer, he can use the four subwoofer
wires (see my
subwoofer writeup) to do his hookups.
08-04-2002, 07:20 AM
hdd3md //m-powered Location:
Chicago, IL 2001 M Rdstr writes:
You must take apart the center console and remove the roll hoops on
either side, and take out the middle piece where the subwoofer sits.
follow instructions on roll-hoop retrofit on mz3.net then, push up on
the bottow of the roof liner to separate it from the metal cage in the
middle. Go to the trunk, and remove the back liner (grey) from the forward
part of the trunk. on either side, are two grommets with lots of wires.
i would feed all audio cables on the driver's side as the passenger
side carries the (+) battery lead, and can induce noise.
From the cabin you can feed the wires directly through to the grommet
hole (some 2-3 inch hole) on the driver's side....
I ran 3 pair micro XLN rca cables (monster cables), and have no noise.
i also ran a 4 pair and 2 2-pair extra cables for upgrades in the future
(to carry low-impedance electrical signals...)......
good luck
drex
Scott
Barton's cockpit to trunk
98 M Roadster Stereo System Upgrade
(aka Z3 Stereo Installation for Dummies)
TexZan
(VA/DC) on 2004-02-13 at 23:04:43
a
quick pointer to anyone installing an amp...After spending
countless hours trying to find where the alternator whining was
leaking into my new setup, it turns out it was the speaker wire,
not the RCA cables (now for a return trip to Best Buy to return
the shielded ones I bought that didn't work anyway). To finally
solve the problem (without buying super-expensive speaker wires),
I tapped into the factory amp wiring harness for any wires in
the trunk, which was pretty-much rendered useless anyway by this
point because I was using my Blaupunkt. If I needed anything run
outside of the trunk, I would then switch to other cables. Not
only did this solve the whine, I saved me trying to get cables
through the grommet (which is a pain).(I
wish I knew how he did this and wish we could have done this!)I
then ran the RCA through a pre-existing hole in the left-side
ceiling of the trunk (follow where the trunk interior light wires
are) and out behind the factory amp. This ensured no interference
from the power cables and a very clean look (even though the carpet
covers it all anyway). Had I known that speaker cables would leak
as much noise as these did, I would have used this setup the first
time and saved many hours of hunting!

|
Zman's 1997 BMW Z3 1.9 liter
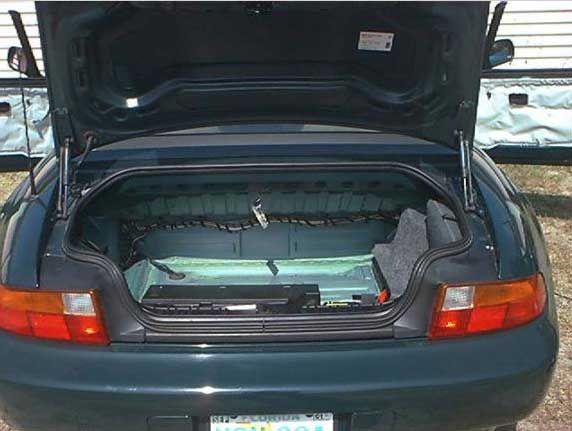
Alan's MZ3 Porting:
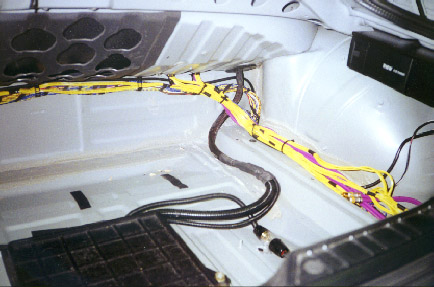
Rachel's Z3 97 2.8, driver's side front trunk-(original):
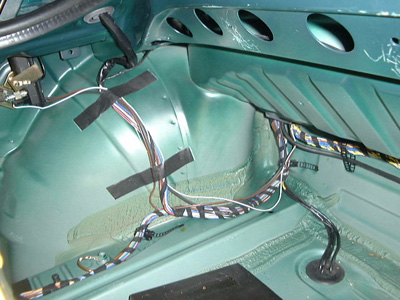
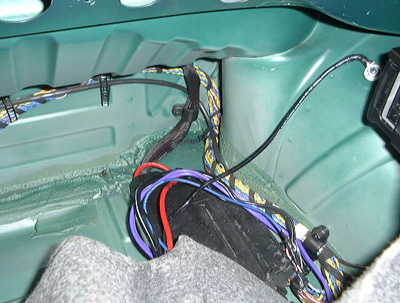
Rachel's Z3 97 2.8, driver's side rear trunk (original):
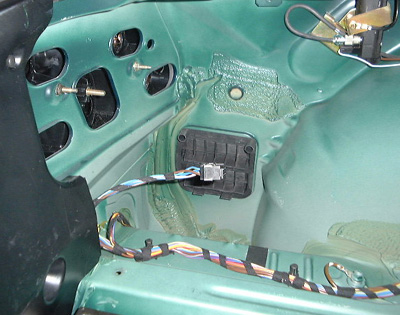
Rachel's Z3 97 2.8, passenger's side front trunk (original):
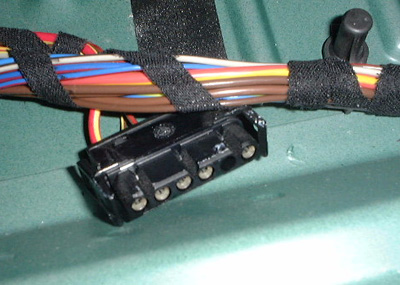
Rachel's Z3 97 2.8 Connector in the trunk (no idea what it's for)
|


 Esmerelda's Pages ~ Z3ers.com


