| DISCLAIMER: I am not
a professional installer, I do not work for BMW or Becker or Harman
Kardon, I make no profit and sell nothing to do with these things, these
instructions are just my own experiences, mess with your wiring and
electrical system at your own risk!
First, a few basic points- like WHAT are you installing?
- ALL Traffic Pro units work in all cars.
- US and Euro Traffic Pro units are NOT interchangeable
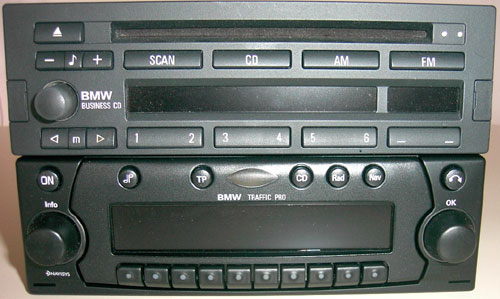
- Differences between the 4771 (BMW US version) and the 4773 (aftermarket
version)
- 4771- The 4771 unit is made to work with BMW's proprietary
electronics as a BMW part - but BMW abandoned the project and
it never came to the market. A few 4771 units were produced before
the 4771 was abandoned. Some BMW owners were lucky enough to grab
those abandoned units before they went to the trash bin. These
install instructions are geared to those few BMW owners, but they
are generally the same for the 4773 units, however, a 4771 is
not a 4773, a 4773 is not a 4771.
There is also a "Universal Adapter Cable" which Ron
Stygar has thoroughly mapped. It will never support the BMW
CD changer. If you can't get the right BMW adapter cable, the
Universal Adapter Cable is your only shot.
4771 units, the "BMW US Traffic Pro" units, match the BMW interior
lights, work with the BMW CD Changer prewiring, BMW steering wheel
volume controls, BMW Speed Sensitive Volume (SSV), and have the
BMW "face".
- 4773- BMW "faces" can be bought for the 4773 but they will
never work with the BMW CD changer or steering wheel volume controls,
they will never match the color of the rest of the 4773 lights
(buttons), the "red" color is slightly different than the "BMW
red". At the time of this writing, red 4773's are sold out and
only "amber" 4773s are left.
- BMW US Traffic Pros work seamlessly with ALL BMWs, these install
instructions happen to be on my Z3. What I know about the other BMW
models I will add, all new information,
corrections and additions are welcome!
Parts Needed:
OK, here we go: (I am guessing that smart people will disconnect their batteries before messing about with splicing wires. I didn't do my own install, the Becker folks did it for me and it all happened too fast for me to see.)
- Parts needed- really only a few things for the Z3 install:
- 1- You need whatever it takes to remove your current
head unit,. If that is the stock BMW unit, (the "Business
CD" player) then you should use the special
"star" tool to loosen
the bolts. A hex wrench will strip the insides of the release
nuts. Store the star tool with your stock radio, you won't be
needing it any more.
- 2-Whatever you do to splice wires, you will be doing
that twice, once for the speed wire and once for the
reverse lights wire. So uh, a needlenose pliers.
You might use the BMW pins and some crimping tools.
Ron Stygar wrote: I use the BMW pins shown in the following
pic.

When ordering have the parts guy lock the number so that it doesn't
cede to the ones with the wire number.
I crimp with long nose and solder.
John Firestone
just purchased some crimp tools.
Or you can use this pin:
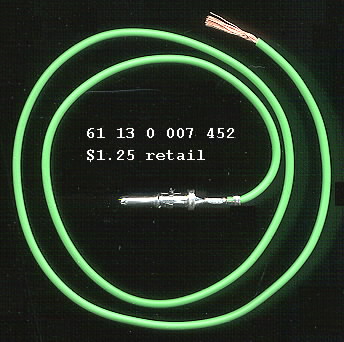
Also from Ron Stygar's posts. If anyone knows which pin part number
to use for the SSV and also for the Reverse lights, please email
me and I will clean this up?
- 3- Whatever you need to fish the antenna wire through
the dash and to fish the reverse light wire to the reverse light
plug. Like a wire hanger. (Non-Z3 cars who have trouble
getting to their reverse lights can skip doing that one, it just
lets Traffic Pro if you are backing up.) Z3 owners need only a
flat head screwdriver to nudge the vents out of the dashboard
and a phillips head screwdriver to take the screws out of the
flap by the console. (Again, please email
me if you can tell other models how to do this, I will add
the info.)
- The correct adapter cable from Traffic Pro
to your BMW model. Non-BMW models have another harness altogether.
- Really, the parts needed are minimal- for a Z3 install anyway.
Summary Parts List:
- Star Removal Tool (stock head unit only)
- Pliers/BMW pins and crimpers
- Wire hanger
- Flat Head Screwdriver
- Phillips Head Screwdriver
- Harman/Becker adapter cable
- Magazine or clean paper
Everything else is in the box!
What's in the box?
- Since these are not really being sold, it may vary a little. I
got some parts that will later be left out, but here's the entire
contents:
-

- These items on the right will not be used for
the Z3 install and probably wont be in your box:

- The Universal Traffic Pro Adapter is for non-BMW cars. BMW
cars use one of two adapter harnesses with everything built
in, plug and play.
- There are wires with female RCA plugs for a non-BMW car with
an aftermarket amp
- In the bag here with the chrome keys is an antenna adapter
and holder for the diversity antenna some BMWs use.
- These were in my package because this is one of the first units
they sent out, remember this is not really an item for sale by BMW
or Harman/Becker and the manuals are not written for BMW owners
or the 4771 because again, this item was never really sold.
- This is the hardware you need to install a BMW US Traffic Pro
(4771) in a Z3:

For other BMW models you might use a different adapter cable, and
you would use the diversity antenna adapter and you might need a
trim kit if your stock radio is a different size.
Plug it in
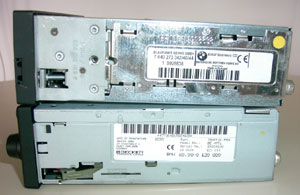
The back of the units are much the same but just a little different
in the area of the connectors, which is why you need an adapter cable.
(For Z3s the adapter cable is p/n 139.624 with a gray tag.)
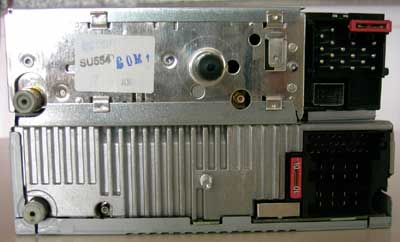
One end of the adapter cable mimics the stock unit plug perfectly,
both the head unit and the CD changer plug if you are using it.
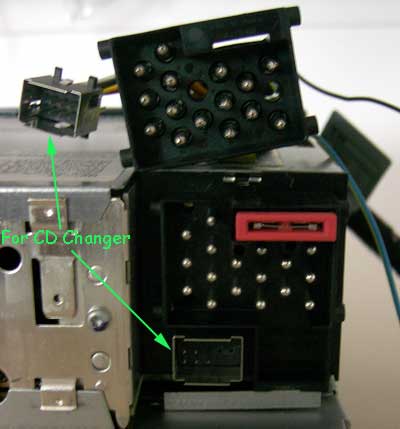
The other end of the adapter cable fits the Traffic Pro plugs perfectly.
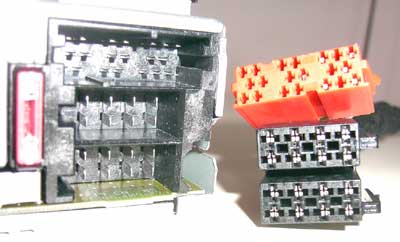
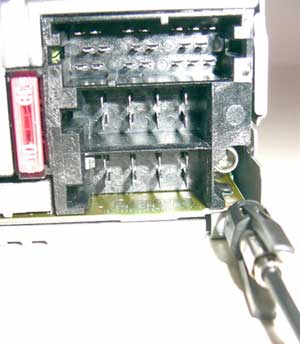
The GPS antenna will plug in in the corner

The GPS antenna plug has flat sides to fit into the slot on the Traffic
Pro
Anti Theft- the Finger in the Hole
Unscrew the bullet-shaped head from your stock unit and screw it onto
the back of your Traffic Pro. (My car had a bullet with the screw
seated in it, in that case, you can unscrew the protruding screw from
the traffice pro and screw the seated screw into the Traffic Pro.)
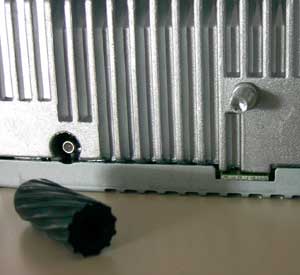
You will be carefully sticking this protruding finger into the anti-theft
trigger mechanism behind the console when you are done connecting
all the wires.
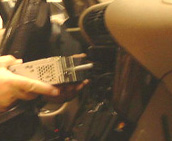
(Picture of the trigger mechanism coming, it's basically a plastic
piece with a hole in it, and another plastic piece spring loaded with
a "trigger". ) If someone steals your head unit, it pulls the "finger"
out and the trigger is released setting off your theft alarm. Even
if you don't have an alarm, you have this trigger. It's a little pita,
but you have to do it. In the Z3 you can cheat by carefully opening
the flap on the passenger side of the console and reaching behind
the head unit to guide the finger into the hole.
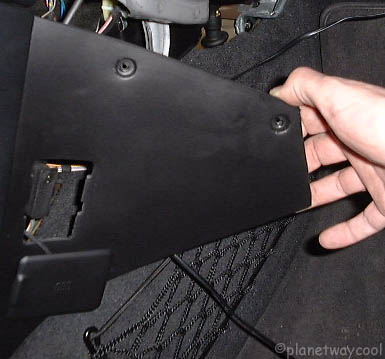
Be careful as the flap opens, it scratches the glovebox as it slides
by. Use a magazine or something to let the flap slide by without rubbing
the glove box.
Wiring
So now you know how to plug everything in except the two wires that
are hanging out of the adapter cable. They are:
- Black and White= Speed
- Turquoise and Chatreuse=Reverse
(Folks I know I am weak on these two wires, any help
would be appreciated, proper terminology, part numbers, pics...)
Wiring colors match the same wires in the BMW.
Your job is to splice these two wires appropriately - or use the pins
I described in the Parts Needed section.
You must connect to the Speed Sensitive Volume (SSV) wire for the
Traffic Pro to function, it is located behind the head unit in the
console.
Many people use Traffic Pro without hooking up the reverse lights-
this only lets Traffic Pro know when you are going backwards to give
you better directions. Mine is hooked up. In some cars the reverse
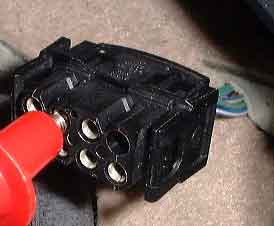
wire is impossible to reach. The connector for the reverse lights
in the Z3 is easy to reach, it is under the gear shift boot, here
is the pinout:
GPS Antenna placement and routing the GPS Antenna
Wire
Place the GPS antenna in the middle of your dashboard down where it
meets the windshield (I guess coupes could mount it on the roof?).
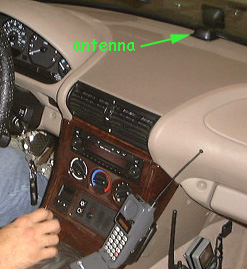
Run the GPS wire along the windshield to the passenger side A pillar.
Then you can use the same procedure outlined in the Book
Of Ungo to run the GPS antenna wire back to the head unit to plug
it in.
Basically that means you pull out the side and center vents (some
Z3 vents also have a screw, mine just pulled right out easily)
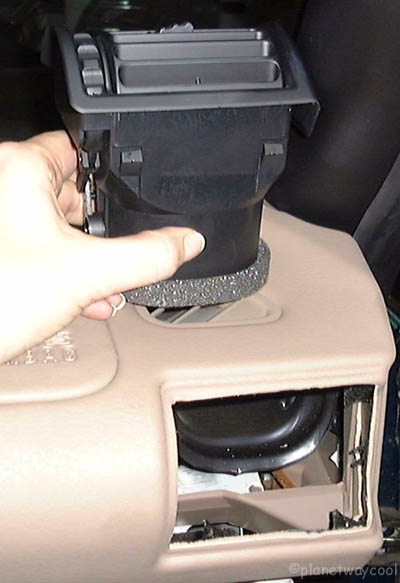
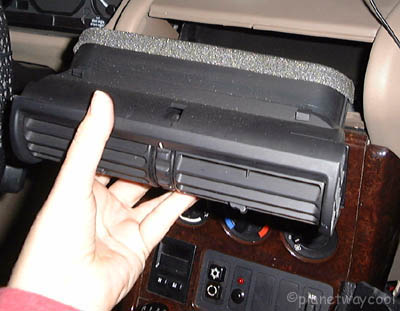
Drop the wire down behind the corner of the dash by the A pillar into
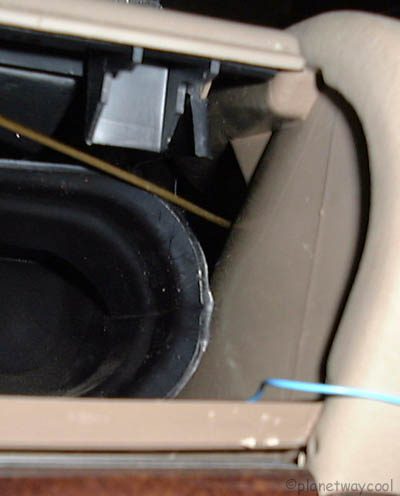
the side vent- as the blue demonstration wire is here:
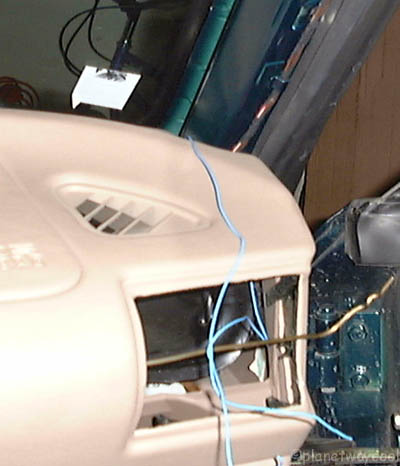
Again follow the blue demonstration wire to get from the passenger
side of the dash ....
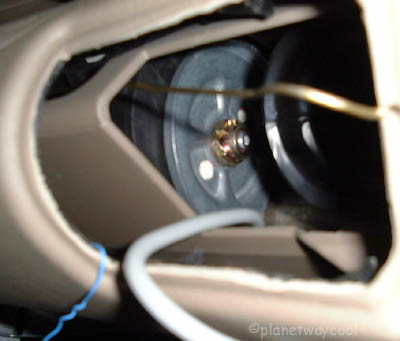
...to the center vent
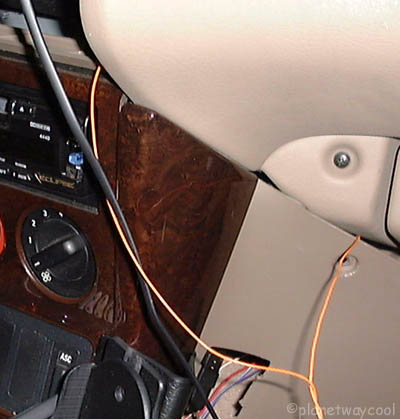
And here the orange demonstration wire shows you how you can reach
up under the flap to grab the GPS antenna wire and plug into the back
of the Traffic Pro.
After it's connected
With all the wires connected, use your chrome installation keys to
align the Trafic Pro, carefully guiding it's finger into the antitheft
trigger mechanism. Press on the spring loaded levers on either side
of the Traffic Pro to release the keys, push it gently into place.
Now you can follow the directions in the manual to calibrate and
install your mapping software, pick a voice for your Traffic Pro and
set off on any adventure. Welcome to the wonderful world of Traffic
Pro, where you never have to write down directions again. Make sure
you pick up some maps anyway, Traffic Pro isn't meant to obsolete
maps, it just makes everything so... much... easier.
Please join the BMW
US Traffic Pro Users Group and share your tips and tricks with
the rest of us!
|
 back to Traffic
Pro Users page
 Esmerelda's Home Page~ Z3ers.com
all material on these pages is copyrighted


